Article
What should buyers know first?
Short answer: Organize slip dress sample approval around strap settings, neckline coverage, lining, movement and size questions before releasing the identified garment.
Slip dress sample approval should identify the actual garment, material combination, strap settings and fit conditions before anyone signs off its appearance. Review the neckline, bust and side coverage, lining, hem and movement together. An attractive front photograph is useful, but it cannot establish how the sample sits at the back, what happens after sitting or whether an adjustment has changed the balance of the dress.
Yinshan Fashion supports custom and private-label bulk programmes for brands developing dresses and related womenswear. This is a programme-specific development route, rather than unrestricted ready-stock wholesale. Proposed quantities, materials, sizes, colours, sample requirements and commercial terms need confirmation. This guide explains how a buyer can prepare and record a slip-dress fitting; it does not promise a fit result for every wearer or treat a practical fitting as a certified performance test.
Set Up Slip Dress Sample Approval
Start by identifying the sample in front of you. Write down the style code, revision, labelled size, outer material, lining and any substituted components. The label attached to the sample should match the comments sheet and photographs. If the factory has used a temporary material or fastening, make that exception prominent. A reviewer can learn something useful from a development sample, but should not mistake it for evidence about a final combination that has not yet been made or assessed.
Agree the fit reference and review conditions before adjusting the garment. Record relevant wearer measurements through an appropriate consent-based process, or identify the agreed form where it is being used. State the underlayers, footwear and styling conditions that matter to the review. Keep private fit information in the internal record; it does not need to become public marketing content. The purpose of documenting conditions is to make comparisons reliable and to avoid attributing every visible difference to the dress itself.
Write a short list of decisions for the session. The neckline may need acceptance, the strap arrangement may need revision, or the team may be comparing two lining options. Avoid a general instruction to “approve the slip.” A sample can be accepted for one purpose and remain open for another. Decide who can approve design appearance, who can comment on technical fit and who will issue the final consolidated response. Contradictory messages from different reviewers are easier to prevent than to resolve after another sample is made.
The Dress Collection can help establish the product conversation, but the review must refer to your identified sample and specification. If the starting point is a collection style, record every change requested for your version. A revised back, neckline or length should not be hidden inside a general note that the dress is “similar.” The sample team needs to know which details are intended to remain, which have changed and which the buyer is still exploring.
Separate the Slip Silhouette from Its Fabric and Cut
A slip dress describes a garment direction; it does not by itself identify fibre content or cutting orientation. A buyer should not assume that a glossy slip is silk, or that every fluid-looking version is cut on the bias. Bias refers to a direction relative to the fabric's yarns, and its use must be confirmed in the actual design record. Keep silhouette, material identity and cut as separate fields so that a familiar product name does not conceal an unresolved technical choice.
Review the supplier's material information alongside the swatch and garment. Record the stated composition and candidate reference rather than inferring them from touch or shine. If more than one fabric is being considered, identify which sample uses which option. The silk versus satin guide explains the terminology in more detail. For approval, the essential point is traceability: the buyer needs to know which material produced the appearance being accepted and whether that material remains the proposed production option.
Discuss cutting and construction questions with the technical team instead of trying to reconstruct them from a product photograph. If the design uses a bias-cut approach, ask which relevant records and sample observations should govern the review. The existing bias-cut dress production guide covers that broader subject. This approval session should focus on the completed garment: its shape, seams, neckline, coverage and response under the agreed conditions, with any construction questions returned to the people responsible for resolving them.
Keep changes to fabric and cut visible. A sample made in a replacement fabric can support a limited design discussion, but it should not silently inherit the approval of another material. If the team changes both material and pattern between versions, record both. Otherwise, a better or worse result may be attributed to the wrong change. When the cause is uncertain, state that uncertainty and agree the next comparison. A useful review can identify what remains unknown without inventing a technical explanation.
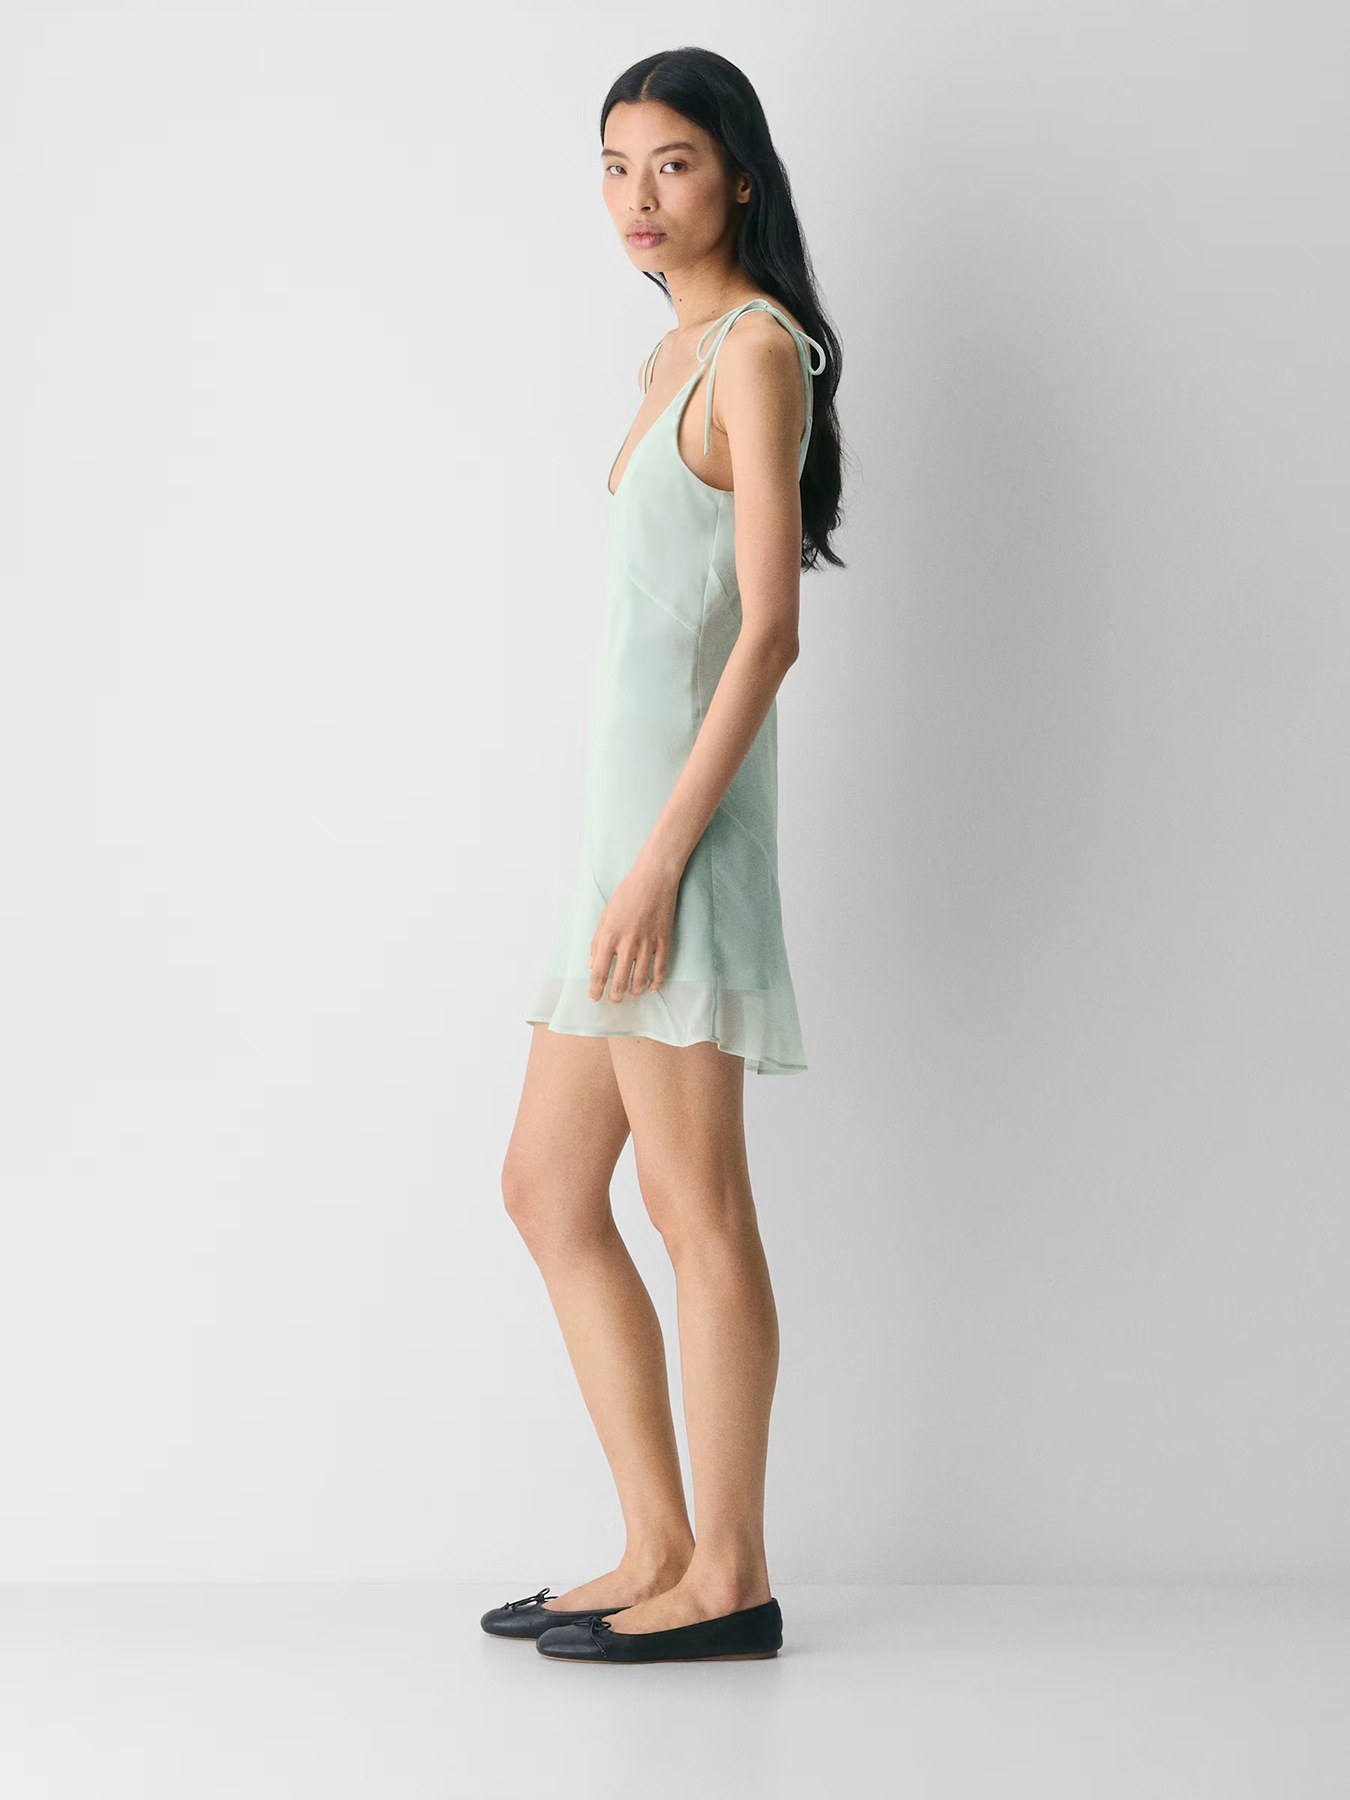
Side-view reference: visible ties and hem layers help frame the sample questions. Check strap settings, lining and movement on the actual sample; the photograph is not a coverage test.
Record Strap Position and Adjustment Settings
Mark the front and back strap attachment locations on the drawing and compare them with the sample. Include the strap width, construction reference and whether adjustment is intended. Examine the visible connection details and note anything that needs technical review. Do not treat the strap as an isolated accessory: its position is part of the neckline and back relationship. If a strap falls away from the intended position, document where and under what conditions before choosing a corrective action.
For an adjustable style, agree a starting setting and record it in a repeatable way. The exact recording method should suit the strap construction; it may refer to a measurable exposed segment or an agreed hardware position. A photograph can supplement the measurement but should not be the only record when the setting cannot be seen clearly. If the reviewer changes the adjustment, note the new setting and the reason. Comparing two photographs without that information may suggest a pattern difference that was actually an adjustment difference.
Observe the relationship between the two straps, neckline and back. If one side appears lower, check whether the setup is consistent before attributing the result to sewing or pattern balance. The observation may warrant a technical investigation, but the approval record should not jump directly to a diagnosis. Likewise, shortening both straps to raise a neckline can change the armhole and overall length relationship. A change that improves one area should be reviewed across the rest of the garment rather than accepted in isolation.
If the brand is also developing a camisole, the Blouse Collection provides a relevant route for discussing top variations. Do not assume that a strap arrangement approved for a dress transfers unchanged to a top. The garments differ in length, intended outfit and potentially other construction details. Use the dress result as a reference for the discussion, then identify what the top must demonstrate independently. That preserves useful learning without expanding an approval beyond the product actually reviewed.
Review the Neckline and Bust Coverage Together
Begin with front, side and back views in the agreed standing position. Identify the intended neckline location and compare it with the marked design reference. Record bust-room observations and side coverage as well as the centre-front appearance. A neckline can look acceptable in one view while another view raises a different question. Do not let a favourable front image close the whole review. Each view helps describe the relationship between the garment and the selected fit reference.
Use precise language for coverage concerns. Say where an opening appears, whether it is present at rest or during a particular movement, and what the buyer wants to achieve. “Too loose” can mean several things: a neckline edge standing away, excess body volume or an unwanted side opening. Those observations may require different investigations. The technical team should receive enough information to evaluate the cause before a buyer specifies a reduction that could create a new concern elsewhere.
Review underlayer assumptions explicitly. If the brand expects the dress to be worn with a particular type of underlayer, record that use in the sample brief and observe it under the agreed conditions. Do not promise universal compatibility or support from one fitting. If the design is being discussed without an underlayer, that choice still does not establish a general claim that the garment provides built-in support. Any such construction or product statement needs its own evidence and a clearly defined scope.
Where the sample raises a concern, distinguish a design choice from a defect investigation. A deliberately lower neckline may be consistent with the approved direction but unsuitable for the brand's intended customer. That can justify revising the design without claiming the sample was made incorrectly. Conversely, a sample that differs from the agreed specification needs a comparison against that record. Keeping the distinction clear makes the response more useful and prevents the factory from being asked to guess whether the target itself has changed.
Check the Lining as Part of the Garment
Open the review to the inside of the dress. Identify the lining material, length and attachment arrangement, including how it meets the neckline and any opening. Confirm whether the sample uses the proposed final combination. If the lining is temporary, state which observations remain provisional. A swatch approval does not show how the complete layers sit together. The garment review should therefore connect material identity with actual appearance and movement, rather than treating the lining as a separate administrative field.
Observe visible lining edges and the relationship between outer and inner hems. Record whether the lining appears where it is not intended, whether one layer settles differently after movement or whether an attachment area needs attention. These are observations to investigate, not proof that one construction method is always wrong. Ask the technical team to explain the proposed revision and how its result will be checked. That approach supports a specific correction without turning a single sample into a general manufacturing rule.
Review relevant colours as identified combinations. If the dress is offered in more than one colour, do not assume the coverage observation transfers automatically. Keep the outer material, lining and colour reference together in the record. Note the viewing conditions and underlayers used for the review. A brand that needs formal test evidence should state the required assessment separately and use appropriate qualified support. An internal appearance check should never be described as certification or as a guarantee about all lighting and wearing situations.
Use the custom womenswear development service to discuss unresolved material and construction combinations with Yinshan Fashion. Send photographs of the actual inside and outside, not only a styled front view. Include the outcome you need, such as a specific lining relationship at the neckline, and ask what sample work is required. The resulting decision should identify the accepted combination and any exceptions. A later material replacement then has an obvious reference against which to assess the need for another review.
Observe Sitting, Walking and Arm Movement
Agree a practical movement sequence that reflects the intended garment use. Sitting, returning to standing, walking and moving the arms can provide useful observations when conducted under consistent conditions. The sequence should be comfortable and appropriate for the wearer. Stop if it causes discomfort or an unwanted exposure concern. The purpose is to understand the sample, not to push a person or garment through an arbitrary demonstration. Record the conditions and avoid describing the exercise as a universal performance test.
Observe the whole dress after each movement. Look at the neckline, strap position, side seams, waist or hip relationship, opening and hem. Note whether the garment returns to the intended position or requires manual readjustment, and identify the exact area involved. That information gives the technical reviewer a more complete problem statement than a photograph taken after someone has already corrected the garment. If readjustment occurs, record it rather than removing it from the history of the review.
Use consistent photographs or short internal video where appropriate and authorized. Show enough of the garment to preserve context, then add a close view of the concern. Avoid poses or image editing that changes the apparent fit. A close crop can hide the relationship between strap setting and hem position, while a dramatic angle can make two samples appear less comparable than they are. The review record should make the observation easier to understand, rather than turning the sample into a marketing image.
Consolidate the results before sending comments. If several movements show the same concern, group the evidence under one issue and describe its range. If different concerns may be related, flag that possibility without declaring an unverified cause. The factory can then propose a coherent revision. The wider dress sample fit checklist is useful for organizing the session; the slip-specific record should retain the strap settings and coverage observations that distinguish this style from a general dress fitting.
Link Fit Comments to Grading Questions
Resolve the base-sample questions before assuming the size range is ready. Grading is the development of sizes from the underlying pattern approach; a buyer still needs to agree how the resulting sizes will be reviewed. A neckline accepted on one reference does not establish its position on every size. Ask which measurements, sample sizes and wearing observations are appropriate to the programme. The answer should reflect the actual range and construction, not an automatic rule copied from an unrelated product.
Identify details that may need particular attention across sizes. For a slip dress, strap placement, available adjustment, bust room, side coverage and overall length may be relevant questions. List them as review priorities rather than presuming a problem will occur. Keep the fit reference and measurement method explicit for each reviewed size. If the brand has an established size system, provide it early. A size label alone does not tell a factory which customer measurements or fit preferences the brand intends to serve.
Do not use one wearer's feedback as evidence for the entire customer population. It is valuable evidence about the sample under the recorded conditions. Combine it with the brand's size specifications and agreed review plan. Where the sample range is limited, state the limitation in the approval record and decide what additional evidence is needed. A transparent scope is more useful than an unsupported assurance that adjustable straps will accommodate every difference between customers or sizes.
If a revision changes the base pattern or strap arrangement, ask which size decisions must be revisited. Keep a list of affected documents rather than changing only the sample comments. Measurements, drawings, hardware references and product descriptions may all need alignment. The buyer and technical team should close the change together, with a named version and a clear outcome. This creates a dependable reference for production discussions and makes a future reorder easier to compare with the garment originally accepted.
Compare Two Revisions without Losing the Cause
Consider a hypothetical review in which the first sample has an unwanted front opening during sitting. The buyer shortens the straps during fitting and sees an improvement, then asks for a revised neckline pattern. When the next sample arrives, the team cannot tell whether the changed appearance comes from the pattern, the strap setup or both. This is a planning example, not a claim about an actual Yinshan order. It illustrates why a revision log needs conditions as well as photographs.
Keep the first observation with its original strap setting. Record the adjustment separately, including what improved and what else changed. Ask the technical team to review the issue and identify the proposed correction. When a new sample is made, list all known changes, including material or lining substitutions. Compare it under the agreed starting conditions before making further adjustments. This does not guarantee that one variable explains the result, but it prevents the record from concealing changes that are already known.
If the second sample resolves the front concern but creates a side-coverage issue, keep both findings. Do not classify the whole revision as simply better or worse. The design team needs to decide which relationships must be protected, and the technical team needs to propose the next step. Accepted details can remain accepted while a new issue is investigated. A clear record reduces the chance of repeatedly fixing one area at the expense of another without recognizing the trade-off.
At the end of the comparison, identify the current target and retire superseded instructions from the active brief. Preserve them in the history, but do not leave two contradictory neckline requests in the production file. The next reviewer should see one current specification, one current sample reference and an exception list. That is the practical value of version control: it turns a sequence of observations into an understandable garment decision rather than a folder of pictures whose meaning depends on who remembers the meeting.
Release the Identified Sample and Remaining Actions
An approval should name the sample, material combination, size, colour and scope being accepted. Include the final comments and specify any actions that remain. If the decision covers design appearance but not production release, write that explicitly. If a change can be accepted through a defined record rather than another complete sample, identify who agreed that route and what evidence will close it. Avoid a bare “OK” that asks the factory to interpret the buyer's intended authorization.
Check the final product information against the garment. Strap adjustability, lining, closure and material descriptions should correspond to the approved version. Public images should show the product that will actually be supplied, with appropriate permission for any wearer shown. Keep fit-review images separate where they contain private or unsuitable material. Do not turn an internal observation into a marketing promise such as universal support, no movement or guaranteed coverage. The product description should remain within the evidence the brand can substantiate.
For a repeat order, retain the accepted measurements, drawings, material references and key photographs. Confirm current material availability and any proposed substitutions before relying on the previous approval. A successful earlier garment is a useful reference, not an unlimited approval for changed materials, colours or sizes. A short comparison sheet showing what is unchanged and what has changed can make the next conversation much clearer, particularly if the people handling the reorder were not involved in the first development round.
To discuss slip dress sample approval with Yinshan Fashion, send the identified sample views and fit notes, including front, side and back images, material references, strap settings, reference size and the issues you need to resolve. Add proposed quantities and the intended next decision. The most useful submission explains both what you observe and what result you want, while leaving unverified technical causes open for review. That gives the next sample a clear purpose and the eventual approval a defensible scope.
Review sequence before the next sample
- Identify the sample and repeatable fitting setup.
- Observe straps, coverage, lining and agreed movements.
- Consolidate located comments and review the revision.
- Approve the named version and define remaining size actions.
Occasionwear development checklist
Actions before the next sample
Use the current brief and the identified garment to close the next development decision.
Fix the review setup
Identify the sample, underlayers and strap settings before taking comparison photographs.
Describe the concern
Record where and when an opening or position change appears. Separate the observation from an unverified technical cause.
Close the right version
Name the accepted material, construction, size and colour. List remaining actions before production release.
Buyer action and factory confirmation
Use these questions with the identified garment and current programme brief.
| Decision area | What the buyer should prepare | What to ask the factory |
|---|---|---|
| Sample identity | Provide the style, revision, size and known substitutions. | Does the sample represent the proposed final combination? |
| Straps | Record settings and any changes made during fitting. | Which attachment or construction details need review? |
| Coverage | Show front, side and back observations under agreed conditions. | What evidence is needed to investigate the stated concern? |
| Lining and movement | Retain inside views and observations before manual readjustment. | Which layer or construction changes are proposed for another sample? |
| Grading and release | Define the size evidence required and approval scope. | Which size or material changes reopen the review? |
Continue the production conversation
Slip dress observations and approval boundaries
| Decision | Buyer direction | Record to retain |
|---|---|---|
| Strap setup | Record attachment points and the actual adjustment setting. | Repeatable setup reference linked to each fitting image. |
| Neckline coverage | Review front, side and bust relationships together. | Located observations and the buyer's target appearance. |
| Lining | Assess the complete layers rather than independent swatches. | Material identities and inside/outside views of one sample. |
| Movement | Observe the agreed sequence without hiding readjustment. | Starting position, activity and resulting garment position. |
| Size scope | Do not extend a base-size decision to unreviewed variants. | Size review plan and a clearly limited approval record. |
Buyer FAQs
What belongs in slip dress sample approval?
Slip dress sample approval should identify the sample version, materials, size and review setup, including strap settings and underlayers where relevant. Review neckline and side coverage, lining, garment position and agreed movements. Record accepted points, open issues and the scope of the decision.
Is every slip dress bias cut?
No. Slip describes a garment direction and does not determine the cutting orientation. Confirm the actual pattern and cutting approach with the technical team. Keep material identity, silhouette and cut separate in the brief rather than inferring them from a fluid-looking photograph.
Should strap settings be recorded?
Yes, when straps are adjustable, record the setting used for each comparison. If it changes during fitting, note the change and observe the whole garment again. Otherwise, different neckline or hem positions may be attributed to a sample revision when the setup also changed.
Can adjustable straps solve every fit issue?
No. Adjustment is one feature of the garment, not a universal remedy for neckline, bust, armhole or length concerns. Document the observed issue and ask the technical team to assess the complete construction. Review other garment relationships after any adjustment.
Does an approved base size settle all grading questions?
No. A base-size approval supports a defined sample and fit reference. The brand and technical team should agree the measurements, sizes and observations required for the broader range. Record limitations where evidence is missing rather than assuming that the whole range has been verified.