
Article
What should buyers know first?
Short answer: Plan ecommerce apparel sample preparation with sample-status checks, shot requirements, accurate styling and product-to-image mapping.
Ecommerce apparel sample preparation begins before the photographer opens the garment bag. The brand needs to know which product the sample represents, whether its details are accepted and what information the images must communicate. A well-shot development sample can still create an inaccurate product page if its fabric, fit, labels or construction differ from the garment intended for sale.
For a custom or private-label programme with Yinshan Fashion, identify the samples required for ecommerce and explain their intended use during the development discussion. Sample scope, materials, quantities, timing and any special preparation need project-specific confirmation. This guide does not imply that Yinshan Fashion provides a photography service or that a sample request automatically includes content production.
The buyer's task is to connect the product record, physical sample, photography brief and final product page. Each handover should preserve the garment's identity and approval status. That allows the content team to create useful images while the product team keeps control of what those images can accurately represent.
Ecommerce apparel sample preparation starts with product status
Identify whether the garment is a development sample, an accepted reference, a proposed photography sample or another defined output. These labels should reflect the actual project record. A sample may be suitable for exploring styling while still containing unresolved construction or material details that make it unsuitable for final sales imagery.
Record what is accepted and what remains provisional. The content team should know about temporary trims, substitute fabric, unfinished labels, pending fit changes and other relevant differences. Do not rely on a verbal warning that the sample is almost final; list the specific points and the decision needed before it can represent the product publicly.
Assign a product owner who can answer questions during preparation and image review. The photographer should not have to decide whether a garment detail is intentional, a defect or an unresolved development choice. A clear contact route prevents a practical styling decision from silently changing how the product is presented.
Define the product page before defining the shot list
Identify the information the customer needs to understand the garment. Overall shape, length, neckline, sleeve, closure, pockets, lining and distinctive construction may all be relevant, depending on the style. The shot list should serve those needs rather than reproduce a fixed number of images without considering the product.
Use the dress collection to frame the garment category, then prepare the actual style-specific brief. A dress with a back detail or an unusual closure may need a view that a simpler silhouette does not. The buyer should identify the features that must be visible for an accurate presentation.
Keep commercial styling goals connected to product clarity. A campaign image can communicate the brand's mood, while a product detail image may need a more direct view. Decide which outputs are required for each purpose and avoid treating an attractive campaign photograph as a complete explanation of the garment being offered for sale.
Build a sample matrix by style, colour and size
Create one record listing the samples required for the planned shoot. Include style identifier, colour, size, material reference, sample status and intended image use. Mark shared samples or coordinated outfits explicitly. This gives the factory and content team a concrete request instead of an open-ended instruction to send pieces for photography.
Distinguish the number of physical samples from the number of products or image sets. One garment may be photographed in several ways, while several colourways may require separate accepted references. Confirm the actual sample quantities and scope with the factory; do not assume that the commercial bulk order automatically provides every photography variant the brand wants.
Keep the matrix current when the range changes. A cancelled colour or revised style should be removed from the active shot plan, while its history remains identifiable. The content team should not continue photographing an obsolete sample simply because it is already available in the studio.
Connect every sample to its technical record
Give the physical sample a clear identifier that connects it with the current specification and review history. Use a tag or other agreed method that can be removed from the photographed view without losing the garment's identity during handling. Similar-looking colours and sizes need references that remain understandable outside the product team's office.
Provide the relevant accepted drawing, measurement basis and product details to the content team in a concise form. They do not need every internal development message, but they need enough information to recognise the intended features and identify a mismatch. Keep sensitive commercial information outside the photography package unless it is necessary for the task.
When a sample is revised, update both the physical identification and the linked record. A new sleeve or label should not be photographed under the old approval reference. The buyer should be able to trace a final image back to the actual garment configuration used in the shoot.
Choose the sample size for the intended presentation
Discuss the photography format before selecting the sample size. A model shoot, mannequin presentation, flat lay and hanger view create different preparation needs. The buyer should identify the intended format and agree the relevant sample size and fit basis with the product and content teams.
For a programme related to the blouse collection, clarify how the neckline, sleeve and hem should sit in the intended presentation. The sample should support an accurate view of the accepted garment rather than depend on hidden adjustments that materially change its shape. Any necessary styling should be documented and reviewed by the product owner.
If the sample does not fit the planned model or support appropriately, resolve the mismatch before treating the images as final. A different sample, model, support or shooting plan may be needed. Do not assume that extensive pinning can substitute for a suitable garment while still showing the customer the fit they can expect.
Inspect the garment on receipt
Check the received sample against the matrix before the shoot. Confirm the style, colour, size, material and approval status, then inspect the visible construction and components. A receiving check can catch a wrong variant, missing belt or unresolved label before the studio spends time creating images that cannot be used.
Record any issue with a photograph and a concise description linked to the sample identifier. Ask the product owner to decide whether the sample can proceed, needs preparation or must be replaced. The studio should not make an undocumented repair that changes an accepted design feature or hides a problem the development team still needs to assess.
Keep the sample's condition history where it matters. A mark found after several fittings may have a different context from one present on arrival. Accurate records help the team decide the next action without assigning a cause from a single image or an incomplete recollection of how the garment was handled.
Prepare pressing and surface treatment through an agreed process
Ask the product team for the approved handling and preparation instructions relevant to the actual sample. The studio should not assume that one pressing, steaming or cleaning method is suitable for every fabric, finish and component. Where instructions are uncertain, seek a technical assessment before applying a treatment that could alter the garment.
Define the desired presentation without concealing the product's character. Removing handling creases is different from reshaping a garment into a silhouette it does not have. The content team should understand which folds, gathers or textures are intentional features and which are preparation issues requiring attention.
If preparation changes the appearance unexpectedly, stop and record the observation for the product owner. Do not continue treating the sample merely to make it look acceptable on camera. The team needs to determine whether the issue concerns handling, material, construction or the suitability of the sample for the planned shoot.
Keep styling choices visible to the product owner
Agree the use of accessories, underlayers, footwear and other styling elements before the shoot where they affect the product's presentation. Identify which items are included in the sale and which are styling only. The customer should not be led to believe that an accessory or separate garment is part of the product when it is not.
For a coordinated outfit drawing on the women's trouser collection, confirm the actual pieces and variants being combined. A matching colour name does not guarantee that two samples represent an accepted set. The product owner should review the combination and any claims the page will make about it.
Document styling adjustments that affect perceived fit or length. The buyer can then assess whether the image remains a fair representation of the garment. A stylist's practical solution should not become an invisible specification change, particularly when the same images will be used across several marketplaces or wholesale presentations.
Plan views that reveal the garment's important features
Prepare an annotated shot list identifying the purpose of each view. Front, back and side images may establish the overall shape, while details can show a closure, pocket, lining or construction feature. The required set depends on the style and channel; this guide does not prescribe a universal image count.
Make difficult-to-see features explicit. If a dress has a back opening or a blouse has an internal fastening, the photographer should know how the feature operates and what needs to be shown. Ask the product owner to demonstrate or explain the feature rather than guessing from the garment on the day of the shoot.
Include a check that the image set tells a consistent story. The front view should not show one sample revision while the detail view comes from another without review. Keep all images connected to the same accepted product configuration, or identify and resolve the difference before the set is released.
Review colour representation with appropriate references
Provide the accepted colour reference and the sample identity to the photography and editing teams. Agree the workflow used to assess colour representation for the intended output. Screens, lighting and image processing can affect appearance, so the buyer should know what reference the team is using rather than judging every file in isolation.
Do not treat digital recolouring as evidence that an unphotographed colourway has been approved. If such imagery is considered, the brand must assess whether it represents the actual product accurately and meets the relevant channel requirements. The product owner should review the resulting image against the accepted physical colour and material information.
Keep colour names consistent with the product matrix. A file labelled beige may refer to a different sample from the ecommerce system's sand variant. Use stable identifiers alongside customer-facing names so that the image can be mapped correctly even if marketing later changes the display name.
Capture movement only where it adds product information
Movement images or video can help explain certain garments, but the activity should relate to the product and the information the customer needs. A dramatic pose may obscure length or construction instead of clarifying it. Identify the purpose of the sequence and review it with the product owner.
Use the actual accepted garment configuration and record any styling intervention that affects the result. The model should understand the activity and consent to the recording and intended use. Keep the shoot within the agreed professional process, including appropriate handling of personal information and image permissions.
Do not convert a movement clip into an unsupported performance claim. A garment shown during one activity has not thereby been tested for every related use or established a quantified comfort result. The accompanying copy should remain within the evidence and intended product scope reviewed by the brand.
Separate development defects from image cleanup
Define what routine image cleanup is permitted and which changes require product review. Removing a temporary background distraction is different from altering the garment's neckline, seam, proportion or texture. The editing team should know where that boundary lies for the brand's product imagery.
If an image reveals a garment issue, route it to the product owner rather than automatically retouching it away. The issue may affect the sample's readiness or the accuracy of the product page. A polished image should not conceal a known difference between what was photographed and what the customer is intended to receive.
Retain the original files and the review history according to the brand's normal process. This allows the team to understand what was changed and why if a later question arises. The objective is a truthful product presentation supported by an auditable workflow, not an image that has become disconnected from its physical sample.
Name and map files to the product catalogue
Use a naming and asset-mapping system that connects style, colour, view and revision. The exact convention can follow the brand's tools, but it should be consistent and understandable to the people uploading the images. A folder of files named final one and final two creates avoidable risk when several similar variants are involved.
Keep a manifest showing the sample reference and intended catalogue destination for each accepted image. If the ecommerce platform uses a separate SKU or product identifier, map it explicitly to the development style reference. Do not assume that the person uploading images knows the factory's internal naming or the history behind a marketing product name.
Check the mapping after upload. The correct file can still appear on the wrong colourway or product if the catalogue association is wrong. Review the customer-facing page and variant behaviour using the actual accepted records, rather than treating successful file transfer as proof that the presentation is correct.
Prepare product data alongside the image set
Collect the accepted composition, care information, size guidance, features and other product data needed for the intended channel. Identify the source and review owner of each field. A photographer's observation or a styling note should not become the authority for a technical statement about the garment.
Keep claims tied to evidence. If the brand wants to describe a material as recycled, organic or certified, or make a performance statement, obtain the appropriate product-specific review before publishing it. An image of a label or an attractive fabric detail does not establish the supporting evidence for a broader claim.
Review translations and shortened descriptions against the same product record. A marketplace title, mobile summary and full product page should not describe different materials or fit intentions. If a source field changes, identify every channel and language that needs updating rather than correcting only the main website paragraph.
What ecommerce shot list should travel with an apparel photography sample?
An ecommerce shot list is a product-information brief, not a request for a fixed number of attractive pictures. It tells the photographer, sample owner and commerce team which questions each view must answer. Start with the current style-colour-size sample record, then name the views that let a customer understand the silhouette, material-facing details, closure, construction and included components without inventing features that the garment does not have.
For a custom or private-label programme, Yinshan Fashion can discuss which sample, fit reference and physical details are available for a proposed photography handover. The buyer still needs to decide the target sales channel, the approved sample status and what information a product page must show. A collection reference such as the dress collection helps describe a category, but it does not replace a style-specific brief or establish that every pictured dress shares the same material, length, fastening or finish.
Build the list around purpose rather than camera terminology. An overall front view can establish the outline and neckline. A back view can reveal a closure, seam, opening or design feature that would otherwise remain ambiguous. A side view may help a buyer review volume, length relationship or drape. Close views should be assigned only when they answer a product question, such as how a cuff closes, how a pocket is placed, how a tie is constructed or how a visible texture reads. Keep a separate field for a model, mannequin, hanger, flat-lay or detail presentation because each format can alter what is observable.
| View or asset | Product question it should answer | Sample and data reference | Review owner before release |
|---|---|---|---|
| Front overall | What silhouette, neckline, sleeve and visible length are shown? | Current style-colour-size sample and named fit basis | Product owner |
| Back and side | Which back feature, closure, volume or proportion needs a customer-facing view? | Same accepted sample or an explicitly identified alternate | Product owner and content owner |
| Detail | Which component, texture, fastening, pocket, label or construction feature must be visible? | Detail callout from the current product record | Product owner |
| Colour and variant view | Which physical colourway and variant is represented? | Stable colour identifier and sample tag | Product and commerce owners |
| Size or fit-supporting asset | What measured or stated fit information belongs next to the image? | Approved measurement basis and description fields | Product owner and commerce owner |
Write the answer in the shot-list row rather than relying on a photographer to infer it from a mood board. A blouse with a hidden placket, a curved hem or a cuff detail may need different evidence from a blouse without those features. The blouse collection is useful context for naming a category and silhouette, while the actual development record needs to identify the buyer's own construction and revised components. Mark a view as optional when it is a campaign choice, and mark it as required when omitting it would make a material product feature unclear.
The list should also identify what must not be implied. A full outfit photograph may include shoes, belts, jewellery, layers or props that are not sold with the garment. A movement image may show a pose that does not document the fit basis. A close crop can make a sample material look different from a general view. Where that context matters, give the content team a plain instruction such as “styling-only accessory,” “not a separate colourway,” or “detail from the identified sample revision.” The goal is a consistent product page, not a gallery that mixes several sample states.
Before a shoot, use one compact pre-flight card: confirm the style-colour-size sample tag; the current sample status; the source of the proposed product description; the required views and their purpose; included versus styling-only items; open differences from the intended bulk record; and the person who can stop a view from being released. This card helps a small brand keep studio, sample and commerce work connected without treating photography as proof that every production question has been closed.
Which measurement and product-description fields must accompany the image set?
Images work best when the page carries a controlled fact set alongside them. The photography team does not need to author technical specifications, and a product-description writer should not estimate a garment measurement from a photograph. The buyer should decide which data fields the product page needs, name the source and owner for each field, and link each field to the precise style-colour-size or size-range scope it describes.
At minimum, separate garment measurements from fit guidance. A garment measurement describes a defined point on a named size using an agreed method. Fit guidance explains how the brand wants a customer to interpret the garment, such as the intended silhouette or which size reference was used for the page. Neither statement should be copied from a sample label, a model impression or a similar older product without a current review. If the item is part of a coordinated look, say whether the pictured lower half is a separate style, a set component or styling only.
| Product-page field | Source that should control it | Scope to record | What the image team should do |
|---|---|---|---|
| Style and variant name | Buyer-approved catalogue record | Style, colourway and current revision | Map file names to the same identifiers |
| Garment measurements | Approved measurement chart or stated review basis | Measurement points, unit, size or size group | Do not estimate or redraw measurements from images |
| Fit and size guidance | Buyer-approved product description | Named sample or model context, where used | Keep image captions consistent with the approved text |
| Materials, care and feature claims | Relevant buyer-approved product-information source | Exact style-colour-size scope and evidence owner | Avoid turning a visual observation into a material claim |
| Included components and styling notes | Product and merchandising record | What is sold, what is a set, and what is styling only | Prevent props or separate garments from being implied as included |
| Colour and image version | Sample tag, colour reference and asset manifest | Physical colourway, crop and approved asset revision | Keep alternate colour imagery clearly mapped |
For a trouser-and-top look, the women's trouser collection can help the buyer clarify the category used in styling. It cannot establish the inseam, rise, fabric composition, colour, component set or availability of the buyer's own garment. Put those facts in the controlled record and let the images illustrate only the version that was actually photographed. A page can link a dress, blouse and trouser programme as related product context without suggesting that all products share one measurement chart or sample approval.
Description fields should have owners as well as values. The product owner may approve a construction or feature statement. The brand may own customer-facing naming and fit language. A commerce owner may map the approved text to a marketplace, own site or retailer template. The factory can help the buyer discuss a product-specific sample, material, trim or private-label question, but it should not become the unrecorded source for a consumer claim added during upload. If a fact is not yet confirmed, use an open status and hold the dependent copy rather than replacing it with a broad promise.
A useful handover can include an “image-to-fact” check: open each selected photograph beside the current product record; confirm that the title, colour, included pieces, visible closure, key feature and size or fit text do not conflict; and capture any observation as a question for the owner. This is more reliable than approving the photograph and product description separately. It also makes later localisation simpler because the approved source field is clear before a shortened mobile description or translated listing is produced.
Where is the retouching boundary, and what must change after bulk changes?
Retouching should improve the presentation of an accurately identified sample, not replace the product-development record. Define routine presentation adjustments separately from changes that alter the garment customers believe they are buying. Removing a temporary background distraction, correcting a non-product dust mark or applying an agreed crop can be an ordinary image-production task. Altering a neckline, seam, print, texture, garment proportion, colourway, sleeve length, closure or included component requires product review because it changes the product evidence shown to the customer.
| Proposed adjustment | May proceed as normal image work? | Required control |
|---|---|---|
| Background cleanup, agreed crop or removal of a non-product distraction | Often, if it does not change the garment | Keep the approved image version and review path |
| Correction that changes product colour, surface, proportion or construction | No automatic approval | Product owner compares with the physical sample and decides the next evidence |
| Hiding a sample defect or temporary component | No automatic approval | Record the difference and determine whether the sample, page or development record must change |
| Reusing one colourway image for another | No automatic approval | Map to an actual physical reference and buyer-approved channel policy |
| Adding a claim inferred from the image | No | Use the approved product-information source and evidence owner |
Keep the original asset, working file, approved export and review notes connected to the sample identifier. That makes it possible to see whether a later crop or colour treatment changed presentation rather than merely improving image quality. It also protects the content team: when they can point to a named version and owner, they do not have to decide whether a visible discrepancy is a styling choice, a defect or a product revision.
Bulk changes need an explicit page-synchronisation gate. If a buyer changes a material direction, print, label, component, construction detail, colour, measurement basis, pack component or style-colour-size scope after the photography sample was accepted, log the change against the affected product record. Then identify whether the sample image remains truthful, whether a new detail view or sample is needed, which description fields must change, which listings or languages are affected, and who may release the revised page. Do not assume that bulk is “close enough” to the photographed sample because the sample originally passed a visual review.
Use a four-step change card: identify the exact style-colour-size and old versus new revision; compare the revised physical or documented evidence against the released images and page facts; decide whether to retain, label, replace or hold the assets; and synchronise the approved changes across the product page, feeds, marketplace listings, translated copy, packing records and any sales sample that uses the old representation. Each project may need a different decision depending on its confirmed scope. The card prevents an approved image from quietly becoming a statement about a garment that has materially changed.
Before final release, send Yinshan Fashion the sample identifier, current technical or product record, required views, measurement and product-data fields, allowed-retouching boundary, asset manifest and any planned bulk change. This gives the factory a concrete custom-production or private-label discussion. The buyer remains responsible for product claims, ecommerce policy, channel requirements and final page approval. The result is a photography handover that can be audited from physical sample to customer-facing page without promising fixed availability, timing, quantities or performance.
Build a review sequence before image release
Assign the relevant checks to the people qualified to make them. The product team can review garment accuracy, the content team can assess image quality and the commerce team can confirm catalogue mapping and channel requirements. The actual roles should be agreed by the brand, with one clear route for resolving conflicting comments.
Use a review record that identifies the image version, product reference, issue and decision. A broad approved message is difficult to interpret when several colourways and crops are under discussion. State which assets are accepted and which need revision, and keep unresolved product questions separate from ordinary editing tasks.
Review the complete page or listing where practical. Cropping, image order, text and variant selection affect what the customer sees. An individual image may be accurate while the assembled page gives a misleading impression about included items, fit or colour. The final check should consider the actual presentation being released.
Schedule samples and photography through real dependencies
Place the photography requirement in the development calendar early. Identify which samples, approvals and product data must be ready before the shoot. The factory can assess a concrete sample request more usefully than a late instruction to send whatever is available for a campaign already booked.
Use the apparel production calendar guide to connect sample readiness with the broader programme. Keep the shoot date, image-review date, product-page release and bulk availability as separate events. This guide does not promise that every sample can be produced within a fixed lead time or that photography readiness equals bulk readiness.
If a sample is delayed or changes, assess the options with the relevant teams. A revised shot sequence, a different accepted style or a rescheduled output may be considered, but each needs a concrete review. Do not solve a scheduling gap by presenting an unapproved garment as the final product without the necessary product decision.
Manage sample custody and return instructions
Record who holds each sample and what should happen after the shoot. The garment may be needed for further technical review, retailer presentation, reference retention or another agreed purpose. A clear custody record prevents a key sample from being altered, misplaced or sent elsewhere while another team still depends on it.
Provide handling, packing and return instructions appropriate to the sample and the agreed arrangement. Identify any components that must remain with it, such as a belt or separate layer. If the garment is damaged or changed during the shoot, record the condition and inform the product owner before it re-enters the development process as if nothing had happened.
Keep the physical sample connected to the accepted image set. If a later product question requires comparison, the team should be able to identify the garment used and its status at the time. That connection is particularly useful when a development sample and a later production reference differ in an approved detail.
Use a blouse-variant example to test the workflow
Imagine a brand preparing two colourways of one blouse for ecommerce. The sample matrix identifies both garments, their accepted material and current construction revision. On receipt, the content team notices that one sample still has a temporary button. The product owner decides what must happen before final photography, and the status is recorded rather than left as a verbal reminder.
After the accepted samples are photographed, the asset manifest connects each view with the correct colour identifier. The product team reviews the neckline, sleeve and closure presentation, while the commerce team checks the uploaded variant mapping. A later material-description correction is applied to the relevant copy fields without changing the already accepted garment images unnecessarily.
This is a workflow example, not a description of a Yinshan Fashion photography service or a completed customer project. It shows how product accuracy can be maintained through several handovers. The sample, image and catalogue records remain connected, so the brand can identify what was approved and where a correction belongs.
Send Yinshan Fashion a clear photography-sample request
Provide the current style matrix, required colours and sizes, intended photography format and target sample-use date. State the approval status the samples need to reach and identify the product features the content team must capture. Mark any temporary or unresolved elements that would prevent the sample from representing the final product accurately.
Ask Yinshan Fashion to confirm the feasible sample scope, materials, costs and timing for the actual custom or private-label programme. Keep the photography request connected to the current development brief so that later specification changes can be assessed before they create an inaccurate image set.
Use the contact page to discuss the sample requirements. Effective ecommerce apparel sample preparation gives the photographer an identifiable garment, gives the product team a clear review role and gives the customer a presentation that accurately reflects the product the brand intends to sell.
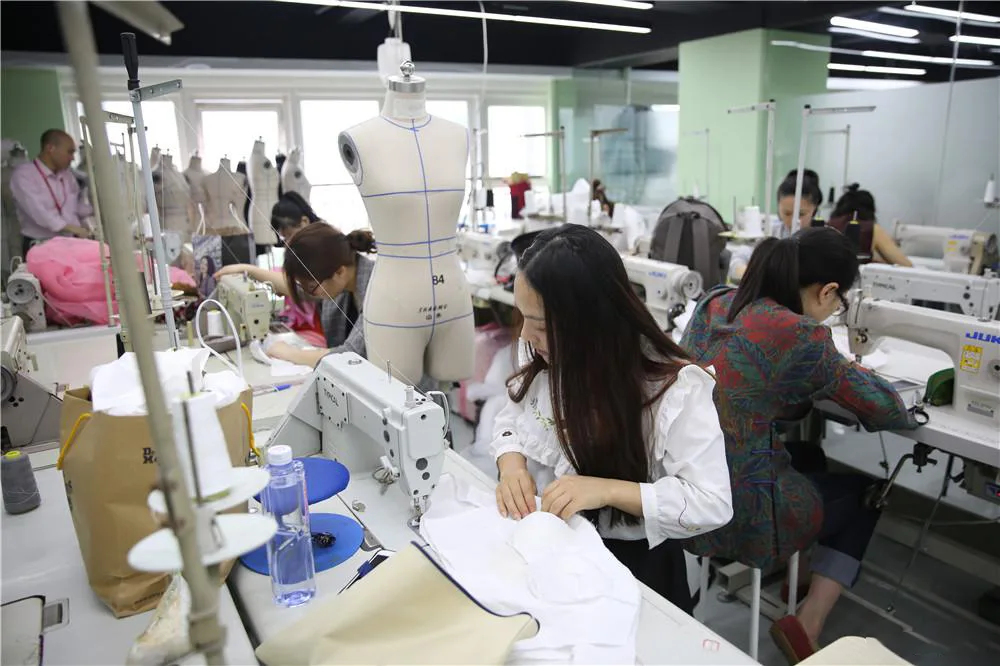
Ecommerce Apparel Sample Preparation worksheet
Three actions for the next handover
Plan ecommerce apparel sample preparation with sample-status checks, shot requirements, accurate styling and product-to-image mapping.
Check the sample status
List temporary components and unresolved details before the shoot.
Photograph the actual product
Keep styling and editing from concealing unapproved differences.
Verify the catalogue mapping
Review the uploaded product and colour associations as well as the files.
Buyer inputs and factory questions
Use this checklist with the current programme. Confirm the actual development scope, commercial terms and evidence needed for each decision.
| Decision area | What the buyer should prepare | What to ask the factory |
|---|---|---|
| Samples | List the styles, colours, sizes and intended uses. | Which sample scope and timing can be confirmed? |
| Status | Identify accepted details and unresolved changes. | What prevents this sample from representing the final garment? |
| Preparation | Supply handling instructions and required product views. | Which preparation questions need technical review? |
| Data | Provide accepted composition, care, features and identifiers. | Which information must remain linked to the sample revision? |
| Custody | Record who holds each garment and its next destination. | What return or retention arrangements apply after photography? |
Continue the production conversation
Ecommerce Apparel Sample Preparation: decision worksheet
| Review point | Buyer input | Evidence to review | Decision before progression |
|---|---|---|---|
| Readiness | Sample purpose and accepted configuration | Current product record and open issues | Can this garment represent the intended product? |
| Identity | Style, colour, size and physical sample reference | Sample matrix and receipt check | Is the studio holding the correct variant? |
| Presentation | Required views, styling and handling instructions | Shot brief and prepared sample | Will the images explain the product accurately? |
| Assets | File naming, revisions and SKU mapping | Image manifest and review decisions | Does each accepted image belong to the correct listing? |
| Release | Product facts, translations and page assembly | Complete listing and variant review | Does the customer-facing result match the accepted garment? |
Buyer FAQs
When should ecommerce apparel sample preparation begin?
Include the photography requirement in development planning, then confirm the sample status, variants and product information needed before the shoot.
Can a development sample be used as final product imagery?
Only after the responsible product review confirms it accurately represents the intended product. Record and resolve relevant temporary or unapproved details.
Does this guide mean Yinshan Fashion provides photography services?
No. It explains how a buyer can request and hand over suitable garment samples. Confirm the actual scope of the enquiry.
Can retouching replace a garment correction?
Do not use editing to conceal an unresolved product difference. Route garment issues to the product owner and define the permitted image-cleanup scope.
What should be checked after images are uploaded?
Verify the actual page, image order, crops, product facts and style-colour mapping against the accepted sample and asset manifest.